
CARVING IDEAS
Easy pumpkin carving ideas for beginners
The easiest pumpkins to carve are made of a few big, separate shapes: a triangle-eyed face, drilled polka dots, cookie-cutter stars, or one bold silhouette. Below are 12 easy ideas, each with its difficulty, rough carving time, the tools you need, and short steps.
The ideas at a glance
Times are rough estimates for the carving itself, after the pumpkin is opened and cleaned out.
| Idea | Difficulty | Carving time | Main tool |
|---|---|---|---|
| Classic triangle face | Easiest | 15 min | Kit saw |
| Round-eyed surprised face | Easiest | 15 min | Kit saw or drill |
| One-eyed monster | Easy | 20 min | Kit saw |
| Toothy grin | Easy | 30 min | Kit saw |
| Drilled polka dots | Easiest | 15 min | Drill |
| Constellation | Easy | 20 min | Drill |
| Cookie-cutter shapes | Easiest | 15 min | Metal cookie cutters, rubber mallet |
| Moon and stars | Easy | 30 min | Kit saw |
| One bold silhouette | Easy | 30 to 45 min | Kit saw |
| Initials or a short word | Easy | 30 to 45 min | Kit saw |
| Simplified photo pattern | One step up | An evening | Kit saw, poker |
| Etched design | One step up | An evening | Lino cutter or loop tool |
What makes a design easy
- Few, big pieces. Every cut is a chance to slip. Five large openings are easier than thirty small ones.
- Space between openings. Leave at least a finger's width (about 2 cm, or 3/4 in) of pumpkin between holes. Thin strips crack.
- Nothing floating. If a piece of pumpkin you want to keep is surrounded by cuts, it falls out. That is why the center of an "O" or the pupil of an eye needs special care.
- Straight lines and gentle curves. A kit saw turns easily around wide curves but not tight corners.
Before you start
- Cut the opening in the back or bottom rather than around the stem. It keeps the top strong, and a bottom opening lets you set the pumpkin over the light.
- Scoop out the seeds and strings, then scrape the wall you will carve to about an inch (2.5 cm) thick. A thinner wall is much easier to cut.
- Draw your design with a washable marker or a ballpoint pen. Both wipe off.
- Use a small serrated pumpkin saw from a carving kit, not a kitchen knife. See pumpkin carving tools for why.
- Light it with a battery LED. See candle or LED safety.
Faces
1. Classic triangle face
Easiest · 15 min · kit saw
Two triangle eyes, a triangle nose, and a wide smile. Draw the eyes point-up for a friendly face, or tilt their inner corners down for an angry one. Cut the nose first (it is the smallest piece), then the eyes, then the mouth. For the mouth, draw a crescent and cut it as one piece; a smile that curves upward reads as happy from across the street.
2. Round-eyed surprised face
Easiest · 15 min · kit saw or drill
Trace around a bottle cap or a small glass for two round eyes, and a larger glass for a round "O" mouth. Round holes are easy to cut with a saw, and small ones can be drilled. Make the mouth a little lower than feels natural; it looks more surprised. Add two slanted slits above the eyes as eyebrows if you like.
3. One-eyed monster
Easy · 20 min · kit saw
One big eye in the middle, with a smaller circle left inside it as a pupil. The pupil is the only trick: cut the eye as a ring and leave a short bridge of pumpkin at the top joining the pupil to the rest of the wall, or the pupil falls out. A wide, wavy mouth finishes it.
4. Toothy grin
Easy · 30 min · kit saw
Draw a wide mouth, then draw two or three square teeth hanging down from the top lip and one or two pointing up from the bottom. Cut around the teeth, leaving them attached where they meet the lip. Keep each tooth at least as wide as your thumb, or it will snap. If one breaks, pin it back with part of a toothpick.
Dots and stars
5. Drilled polka dots
Easiest · 15 min · cordless drill and a few bit sizes
Mark dots with a marker, or go freehand. Drill straight in, at a right angle to the surface, until the bit comes through. Mix two or three sizes for a playful look. Bigger holes let more light out; tiny holes barely glow, so include some larger ones, such as 3/8 in (10 mm) or more. This works on any size of pumpkin and is a good choice if you have several to do. An adult should handle the drill.
6. Constellation
Easy · 20 min · drill
Pick a constellation with a clear shape: the seven stars of the Big Dipper, or the three-star belt of Orion. Draw the stars as dots, using a larger bit for the brightest ones and a small bit for the rest. Scatter tiny holes around it for a night sky. Scratch shallow lines between the stars with a pushpin if you want the shape to read up close.
Shapes
7. Cookie-cutter shapes
Easiest · 15 min · sturdy metal cookie cutters, rubber mallet, kit saw
Hold a metal cookie cutter against the pumpkin and tap it evenly with a rubber mallet until it cuts into the wall. Pull it out with pliers if it sticks, finish any cut that didn't go all the way through with the saw, and push the shape out from the inside. Stars, bats, cats, leaves, and hearts all work. This works best on a wall scraped thin, and simple outlines work better than cutters with thin details. Kids can choose where the shapes go; an adult should use the mallet.
8. Moon and stars
Easy · 30 min · kit saw
Draw a big crescent moon on one side and a few five-point stars around it. Use a cookie cutter or a paper template for the stars so they match. Keep at least a finger's width between the moon and each star. The crescent's thin tips are the only delicate part; cut them slowly, toward the tip.
9. One bold silhouette
Easy · 30 to 45 min · kit saw
A black cat with an arched back, a bat, a witch's hat, a ghost, a haunted house with a pointed roof. Print or draw a simple outline that fills most of the carving side. Cut the shape out so it glows. Choose outlines with no thin parts: skip whiskers, broom bristles, and spindly legs, or thicken them to the width of a finger. The outline is what people recognize, so pick a shape that is obvious even as a plain blob.
Letters and words
10. Initials, a name, or a short word
Easy · 30 to 45 min · kit saw
"BOO", a family initial, or a house number. Use thick, blocky capitals at least 2 in (5 cm) tall. The catch is letters with enclosed spaces, like A, B, D, O, P, Q, and R: if you cut the whole letter out, the middle falls away. Either use a stencil-style font, which leaves small gaps joining the middle to the outside, or draw your own gaps. For an "O", you can also just cut a solid round hole. Spread a longer word across a row of pumpkins, one letter each.
One step up
11. A simplified pattern from a photo
One step up · an evening · kit saw, poker or pushpin
A pattern of your dog, your kid, or a favorite character is more cutting than a triangle face, but it doesn't have to be hard. The trick is a pattern with fewer, wider shapes. CarveKin makes printable patterns from a photo, and its Easy level uses the broadest shapes and the least cutting. Our photo carving guide walks through transferring and cutting one, and choosing a good photo matters more than carving skill.

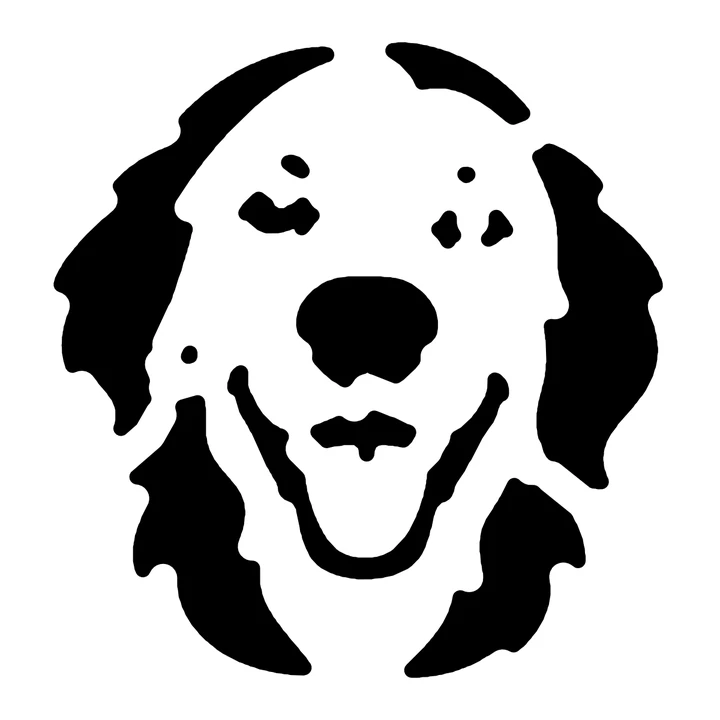

12. An etched design
One step up · an evening · linoleum cutter or clay loop tool
Instead of cutting through, scrape away only the orange skin and a thin layer of flesh. The etched areas glow a softer yellow, and nothing falls out, so a mistake is easy to live with. Draw a simple shape, outline it with a V-shaped linoleum cutter, then scrape the inside with a U-shaped cutter or a loop tool. The wall behind the etched area must be scraped thin from inside, or it won't glow.
No-knife ideas for young kids
Safety agencies advise leaving the carving to adults. Children can still make their own pumpkin:
- Draw the face with a washable marker for an adult to cut.
- Scoop the seeds (and roast them afterward).
- From about age 9, poke the dotted outline of a pattern with a pushpin, with a grown-up nearby.
- Choose where the cookie-cutter shapes go.
- Skip carving entirely: paint, markers, or stickers on a whole pumpkin last longer than a carved one.
More in pumpkin carving with kids and planning a family carving night.
Mistakes that make easy designs hard
- Cutting the big pieces first. Cut the smallest shapes first, then the larger ones, so the wall stays strong while you work.
- A thick wall. An unscraped wall is often much thicker than an inch, and the saw binds. Scrape the carving side before you draw.
- Forcing the saw. Use gentle up-and-down strokes, keep the blade straight in and out, and don't twist or pry.
- Openings too close together. Keep a finger's width of pumpkin between them.
- A wet, slippery pumpkin. Dry the outside, your hands, and the tool handles before cutting.
- Carving too early. University of Illinois Extension says a carved pumpkin lasts about 7 to 10 days; Kansas State University puts it at a few days to a week. Weather makes the difference. See how to make a carved pumpkin last longer.
Want a design everyone can compare? Try the ideas in pumpkin carving contest ideas, or browse pattern examples made from photos.
Make an Easy pattern from your photo
Sources
- How to Carve a Pumpkin for Halloween: 4 Different Ways, Taste of Home (stencil, cookie cutter, and drill methods; 1-inch wall).
- How to Use Cookie Cutters to Carve a Pumpkin, Food Network (cookie cutter and rubber mallet).
- The Best Way to Easily Carve Pumpkins Using Power Tools, Most Lovely Things (drilled pumpkins and bit sizes).
- Tackle Pumpkin Carving with a Drill, Sutherlands (3/8 in bits and mixing sizes).
- Secrets of the Professional Pumpkin Carvers, Scenic Hudson (linoleum cutters for etching; clay and ribbon loops).
- CPSC Offers Safety Tips to Keep Hazards from Haunting Your Halloween, U.S. Consumer Product Safety Commission (leave carving to adults; battery lights).
- How to pick the perfect pumpkin, University of Illinois Extension (how long carved pumpkins last).
- Carve Your Pumpkin, Not Your Hand, Brown University Health (carving kit saws over kitchen knives; dry hands and tools).