
PORTRAIT CARVING
How to carve a face into a pumpkin: portrait guide
To carve a real person's face into a pumpkin, you don't draw lines; you carve light and shadow. Start from a clear photo, turn it into two or three tones, cut through the lightest tone, scrape the middle tone, and leave the darkest as solid pumpkin.
The one idea: carve light, not lines
A classic jack-o'-lantern has triangle eyes and a zigzag mouth. A portrait works differently. The candle or LED inside is your light source, and the pumpkin wall is a filter: the thinner the wall at any point, the brighter it glows. A face appears when the bright and dark areas land in the same places as the highlights and shadows in the photo.
Cut the light parts of the face, not the dark parts. At night the holes glow. If you cut away the dark hair, eyes, and shadows, the lit pumpkin shows a photographic negative, and faces in negative are well known to be hard to recognize.
This is the most common reason photo pumpkins look right on the table and wrong on the porch. Many tutorials say to cut the darkest areas, which looks correct in daylight but inverts after dark. Decide which view matters to you. For most people it's the evening one.
Two tones or three
Carvers usually describe four levels of light in a pumpkin wall:
- Brightest: cut right through.
- Light: skin removed, but not cut through.
- Dim: skin left on, flesh thinned from the inside.
- Dark: skin on and the full wall behind it.
For a first portrait, use two or three of those.
- Two tones (cut or keep). Bold, graphic, and bright, like a stencil. It reads from across the street and is the easiest to carve. It loses soft gradients like cheeks, so the likeness comes from the eyes, brows, nose shadow, mouth, and hairline.
- Three tones (cut, etch, keep). Adds a soft middle glow for cheeks, forehead, and hair. It looks more lifelike up close but takes longer, and it is dimmer from a distance because etched areas glow less.
A good beginner approach is a two-tone cut-through pattern first, then adding a little etching afterward where the face looks flat.
Choose the photo
- One face, filling the frame. Crop from the top of the hair to the chin. Small faces in group photos lose too much.
- Facing the camera or turned slightly. Both eyes visible. Profiles are hard to recognize in two tones.
- Soft light from one side. A window to one side gives the face gentle shadows that become carving shapes. Flat on-camera flash removes them, and harsh midday sun makes hard shadows that turn into odd cut shapes.
- A clear expression. A big smile is the most recognizable expression, but teeth are small separate shapes. Expect to simplify them into one band or a few wide pieces.
- Watch for glasses, hats, and beards. Frames create thin lines around the eyes, and beards and hair add fine texture. They can work, but they usually need a more detailed pattern and more careful cutting.
- A plain background. It becomes either the glowing surround or the uncut wall, so it shouldn't compete with the face.
More in how to choose a photo for a pumpkin pattern. Only carve photos you took or have permission to use.
Make the pattern
You can build a portrait pattern yourself with any photo editor. In GIMP, for example:
- Crop the face square and convert it to grayscale (Image, then Mode, then Grayscale).
- Raise the contrast until the eyes, brows, nose shadow, and mouth separate clearly from the skin.
- Posterize to reduce the image to two or three tones (Colors, then Posterize).
- Decide which tone is cut, which is etched, and which stays. For a lit portrait, the lightest tone is cut.
- Find the islands: any piece of kept pumpkin surrounded by cut areas, such as a pupil inside a cut eye or a tooth inside a cut mouth. Draw a small bridge to connect each one, or change it to etched so nothing needs to hold it.
- Thicken lines that are thinner than your saw can manage at the printed size, and delete specks too small to cut.
- Print it at actual size. See printing a pumpkin stencil at actual size.
If you'd rather not do the editing, CarveKin makes the pattern from your photo. An AI image model draws a two-tone design the way it will look lit, then the pattern is repaired and checked at your print size: loose pieces get bridges, too-thin parts are widened, and details too small to cut are cleared. You see a first look before you pay, choose from a few designs, and print a PDF with a calibration bar. One pattern is $4.99. CarveKin patterns are cut-through designs, so any etching is an optional extra you add while carving.
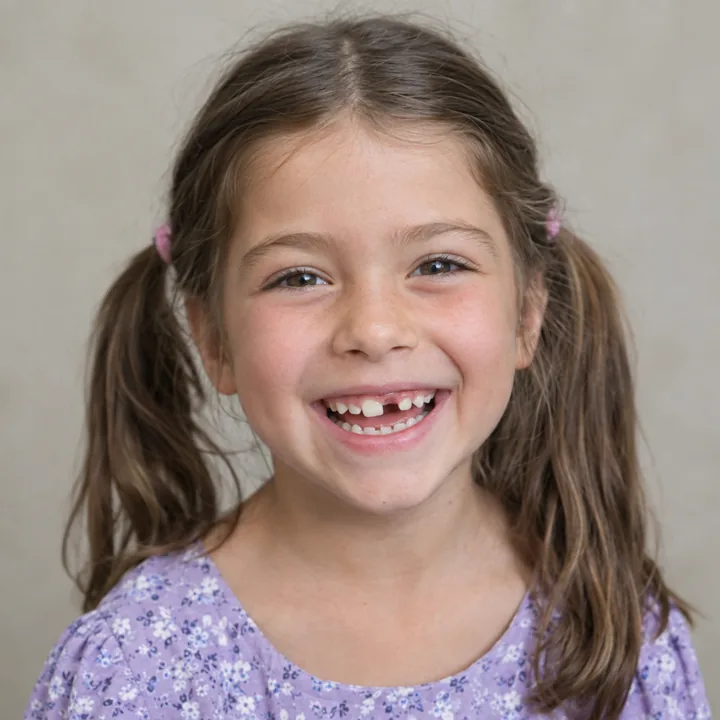


This portrait was requested at Standard detail; her smile needed Challenging detail to hold together. See more in the examples.
Tools
- A small serrated carving saw from a pumpkin-carving kit. Safer and more precise than a kitchen knife.
- A poker, pushpin, or pounce wheel to transfer the pattern.
- A scraper or large spoon to thin the wall from the inside.
- For etching: clay loop tools, a linoleum cutter, or a small wood-carving gouge. A vegetable peeler works for broad areas.
- A small drill bit for round highlights such as eye glints.
- A bright battery LED. Portraits need more light than a tea light gives, and etched areas stay dim with a weak light.
- Toothpicks for repairs, tape, and flour or chalk to show the transfer dots. See also pumpkin carving tools.
Carve it, step by step
- Pick a pumpkin with a large, smooth, flat side at least an inch (2 to 3 cm) wider than the pattern all around. A portrait on a curved surface distorts; flatter is better. See how to pick a pumpkin for carving.
- Open it from the back or bottom and scoop it clean.
- Thin the face wall from the inside to about 1 inch (2 to 3 cm). A thinner wall is easier to cut and glows brighter. Keep it even, because thin spots glow brighter and can show up as blotches in the face.
- Tape the pattern on and transfer it by poking dots every 3 to 5 mm along every edge, closer around the eyes and mouth.
- Cut the smallest details first, starting with the eyes and working outward. Eyes carry the likeness; if they go well, the rest will too. Large openings last, because they weaken the wall.
- Etch the mid-tones after cutting, if you are using three tones.
- Check it in the dark with your light inside, and refine: scrape an etched area a bit deeper if it looks too dark. You can always remove more pumpkin, but you can't put it back.
For transfer, cutting technique, and making it last, follow the full carving guide.
When to etch the mid-tones
Etching means removing the skin and a thin layer of flesh without cutting through. The paler flesh underneath glows softly when lit, and the deeper you go, the brighter it gets. Use it for:
- Cheeks, forehead, and chin, which read as flat holes when cut through.
- Hair, where a glowing mass of cut-through hair would leave the face floating.
- Islands you can't bridge, like a pupil or a single tooth. Etch around them and nothing falls out.
- A longer display. Etched areas expose less flesh, so the pumpkin dries more slowly than one cut through.
Keep the etching depth even within each area, since any change in depth shows up as a change in brightness. Use an LED rather than a candle for an etched design; etching can leave little airflow, and experienced etchers say candles don't work as well.
Common mistakes
- Cutting the dark areas, which makes a negative face at night.
- Starting with the big shapes. The wall gets floppy before you reach the eyes.
- Floating pieces. Every kept piece needs a path back to the rest of the pumpkin.
- Scaling the pattern in the print dialog. A smaller print makes thin parts too thin to cut.
- A wall that is too thick or uneven, which makes cutting hard and the glow patchy.
- Scraping the wall paper-thin. A very thin film of flesh dries out, shrinks, and tears within a day or so.
- Judging it in daylight. Turn the lights off and look before you decide it's done.
- Carving too early. Carve within a day or two of when you want to show it; see making a carved pumpkin last longer.
For the light itself, choosing a candle or LED covers the safety side. Carving a pet instead? See dog and cat pumpkin ideas.
Make a face pattern from your photo
Sources
- Kids of the Wild, How to carve a perfect pumpkin (four shading levels, wall thickness, testing with a light)
- Linda Laforge, Everything you need to know to etch a pumpkin
- A Home Is Announced, How to etch any design on a pumpkin
- Make:, 5 tutorials for next level pumpkin carving
- Preventive Vet, How to carve a photo of your dog or cat onto a pumpkin
- GIMP documentation, Posterize
- Vuong and others, The role of surface pigmentation for recognition revealed by contrast reversal in faces, Vision Research (2005)